


General information
Please check delivery before you start mounting. Everything has to be complete and in a faultless condition. We are not liable for damages resulting from mounting.
Please note: Delivery for model variants KNOBOX PRO 11 to 14 consists of two packages.
Included accessories
- 4 x wall plug
- 4 x hexagon bolt M10
- 4 x washer M10
- 2 x cap nut M4
- 2 x washer M4
- 1 x roof piece
Additionally, for parcel box variants with mailbox:
- 4 x hexagon bolt M6
- 8 x washer M6
- 4 x nut M6
- 3 x hole plug
Additionally, for parcel box variants with function box:
- cable covers
Tools required for mounting
- Open-ended or ring spanner in sizes 7, 10 and 17
Additionally, for parcel box variants with function box:
- Special bit Resis-TX 20
Please note:
For fixing the base plate to the foundation, suitable mounting hardware and, if necessary, additional tools (e.g. a hammer drill) are required, depending on the surface. Suitable materials can be obtained from a hardware store.
Mounting
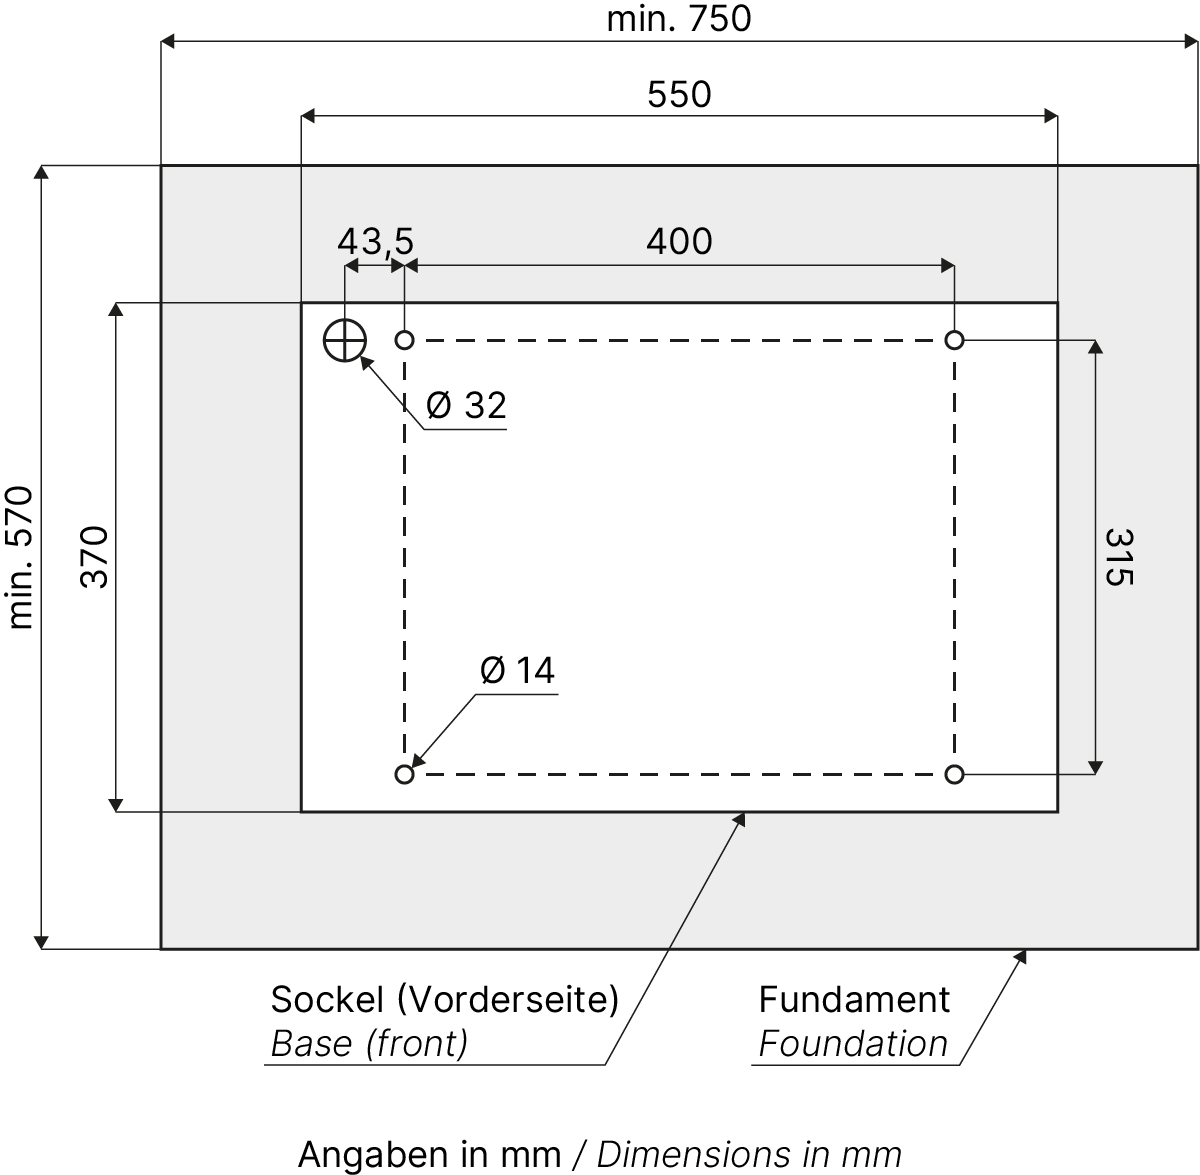
1. Preparing the foundation
Prepare the foundation for the parcel box according to the required dimensions.
For parcel box variants with function box:
Pay attention to the position of the power supply line in the base (Ø 32 mm) at the rear left, so that it can be routed through the opening in the base.
2. Mounting on the foundation
Position the parcel box with base on the prepared foundation. Secure it using a spanner (size 17) and the supplied wall plugs (1), hexagon bolts (2) and matching washers (3).
For parcel box variants without function box: Cover the cable openings with the supplied hole plugs.
3. Installing the box components
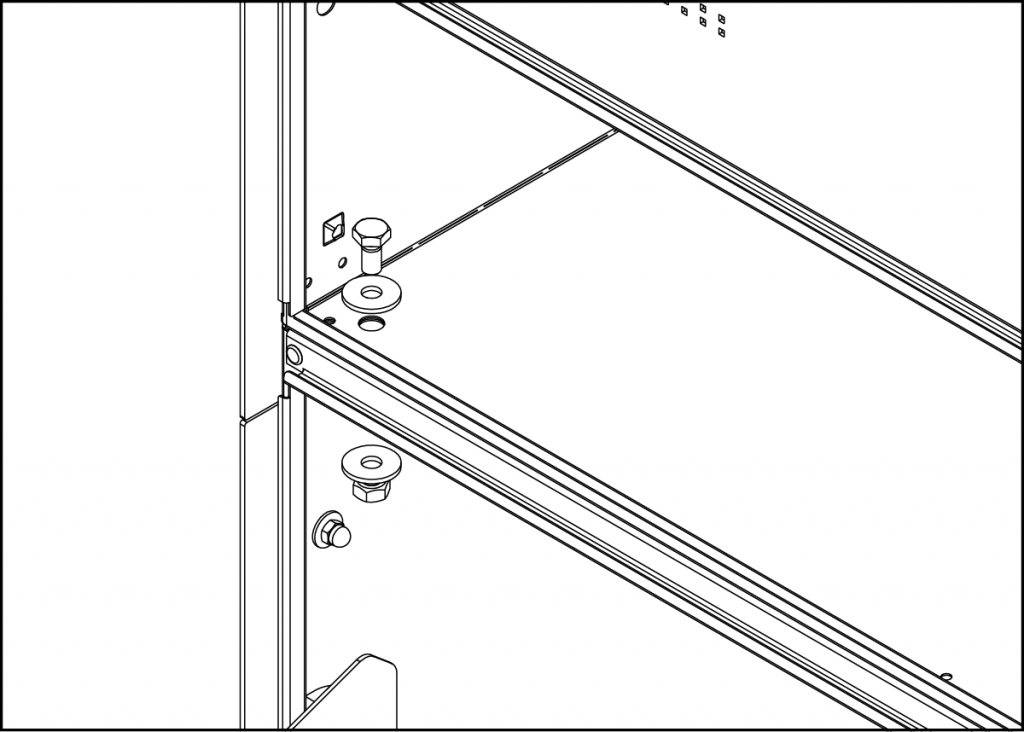
Model variants with a mailbox consist of two parts that must be screwed together. Position the upper unit on the parcel box and open the lower mailbox door as well as the parcel flap in order to connect the two parts. Use a spanner (size 10) and the supplied bolts, washers and nuts for this purpose.
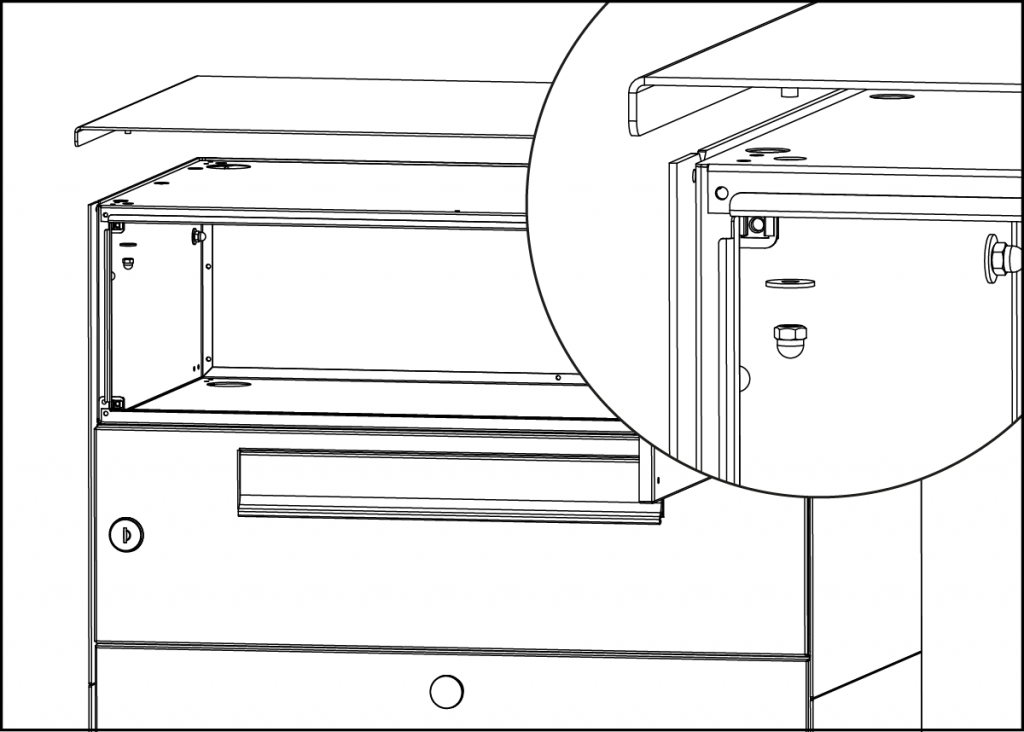
4. Mounting the roof
Position the roof on the box. On models with front removal, the roof aligns with the rear. On models with rear removal, the roof protrudes 30 mm at the rear. For powder-coated parcel boxes, ensure that the bolts in the roof align with the holes in the box towards the front (side with the flap door).
Ensure that the underside of the roof is free of dust and grease. Remove the protective film from the adhesive tape on the top of the box. Carefully place the roof on the box so that it is correctly positioned and press it firmly into place.
For powder-coated parcel boxes: Open the top door of the box secure the welding bolts of the roof to the box. Use a spanner (size 7), the cap nuts (4) and the appropriate washers (5). For parcel box variants with a function box, the safety screws must be loosened using the special Resis-TX 20 bit.
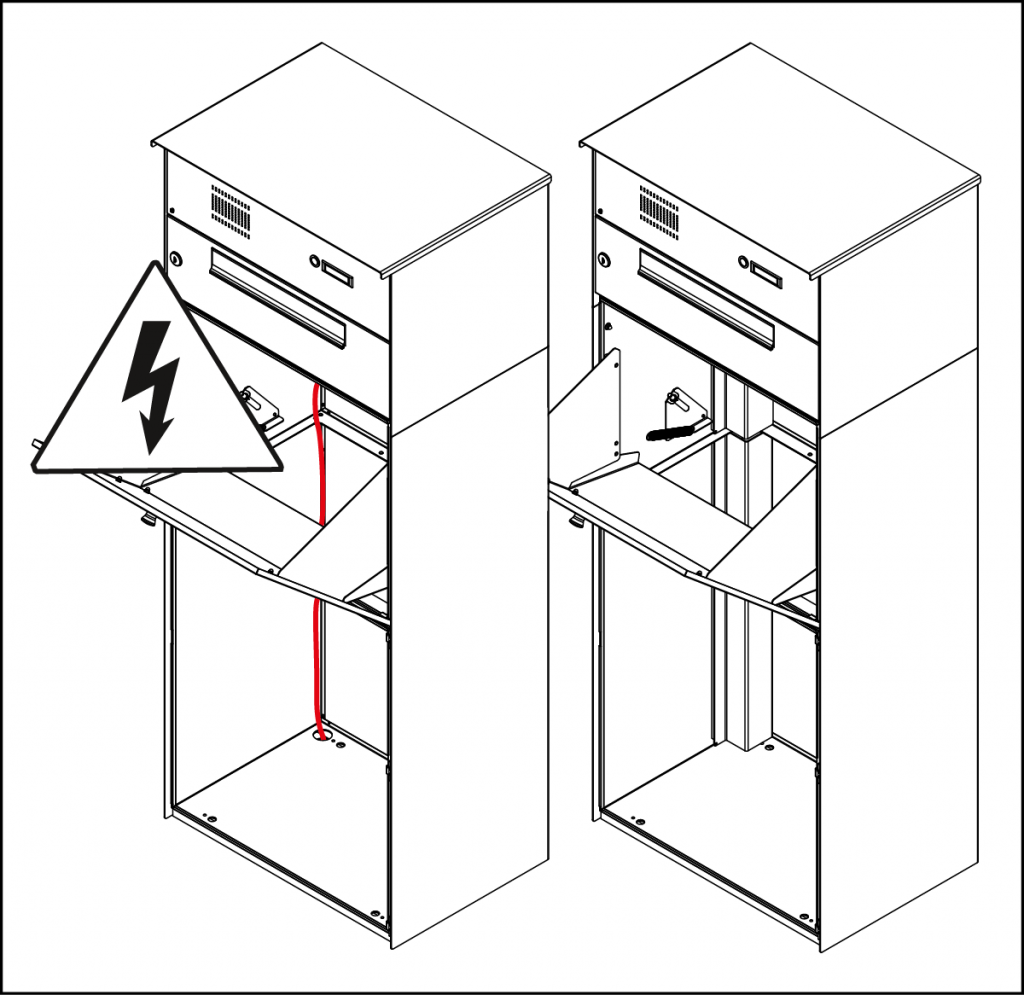
5. Electrical installation
The electrical connection must be carried out by qualified personnel. The safety screws of the function box are loosened using the special Resis-TX 20 bit. The power supply cable is routed through the opening in the base, the parcel box and through the designated openings in the mailbox into the function box. After the electrical connection, the cable covers can be stuck on.
Article No.: M0020-003, Last updated: March 2026